Pretty Wrapped Easter Eggs!
March 30, 2015|Posted in: Crafter's Corner
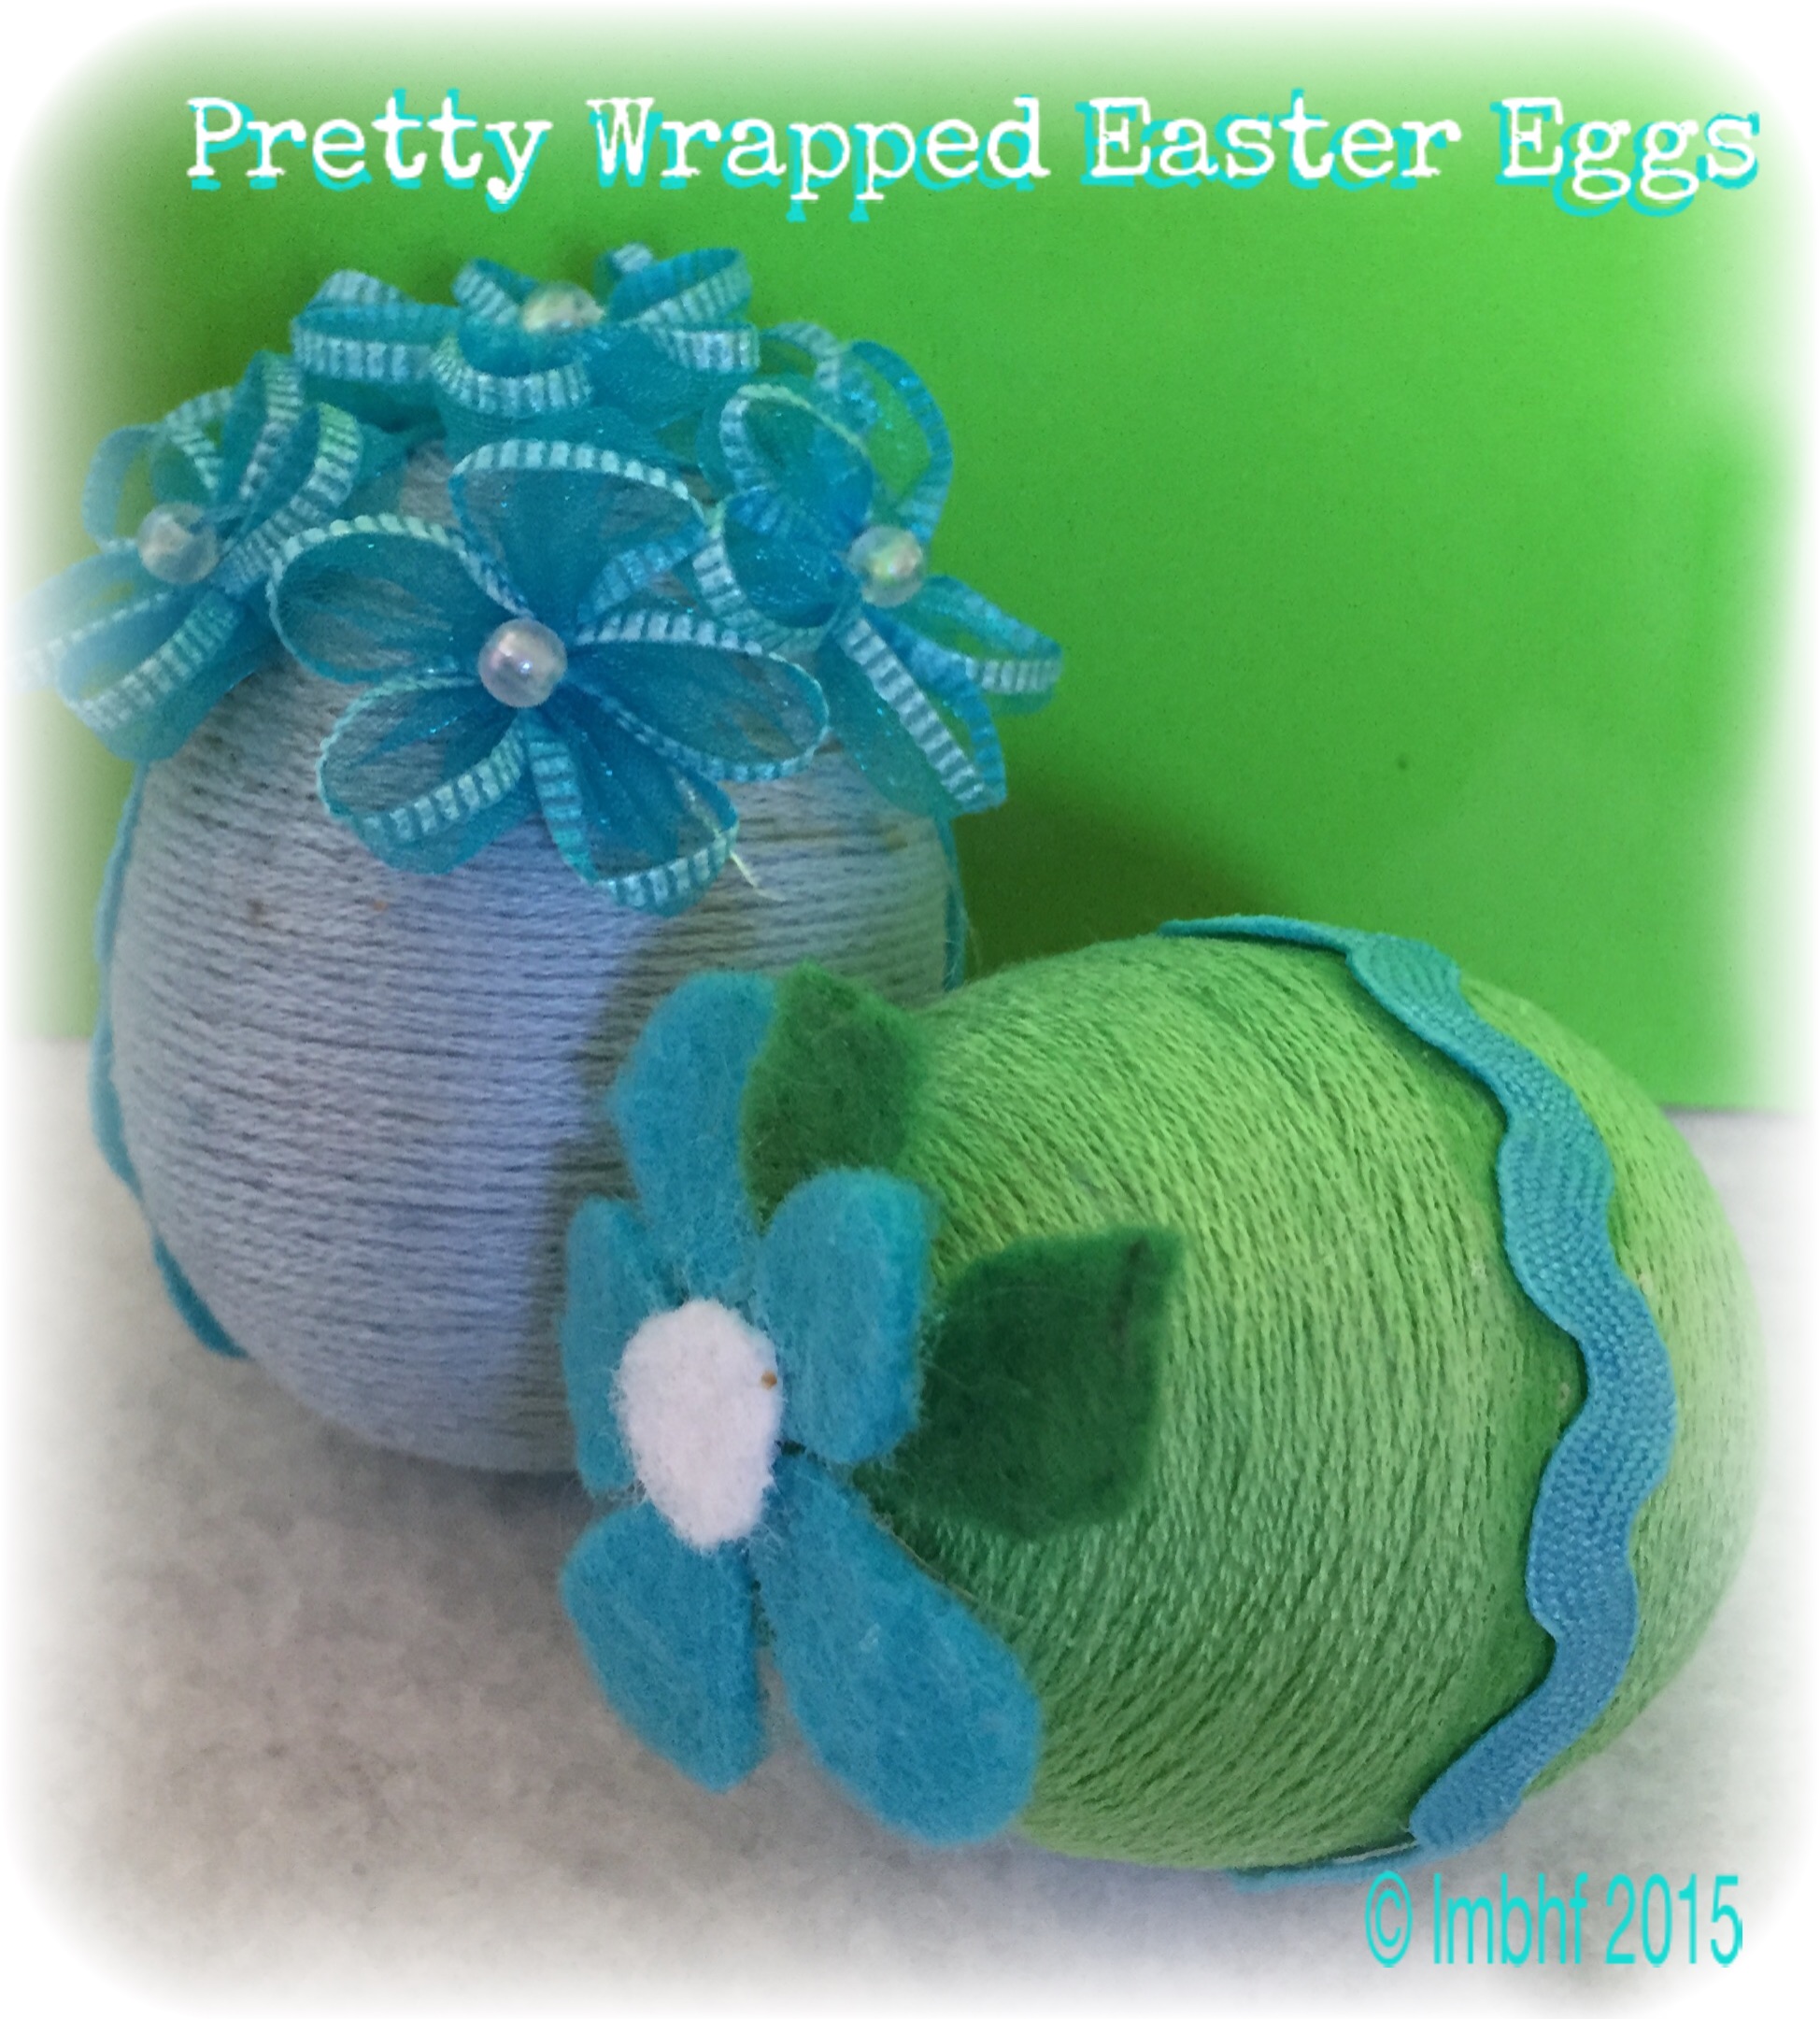
Pretty Wrapped Easter Eggs
Supplies:
- Choose Your Eggs – Plastic Easter Eggs, Actual Egg Shells with middles blown out, or Styrofoam Egg Shapes
- Embroidery Floss
- White Craft Glue
- Hot Glue Gun
- Embellishments such as
Small Silk Flowers
Appliqués
Lace
Ribbon
Felt Pieces
Directions:
- Real Eggs – Make a very small hole in each end. Shake the egg vigorously to break the yolk. Hold the egg over a bowl and blow forcefully into one of the holes in the ends. When all of the contents of the egg has been blown out allow the egg shell to dry for a day or two.Plastic Easter Egg – Glue the two halves together using a hot glue gun or a little super glue. Allow glue to dry.Styrofoam Egg Shapes – These eggs come ready to go!
- Attach the end of the embroidery floss with a dot of white glue and allow to dry.
- Spread about ¼ inch of glue around the egg right next to where the embroidery floss is attached.
- Carefully wrap the flow around the egg in spirals. This is tricky at first but it gets easier as you get closer to the center of the egg.
- Make sure your circled strands of floss are buffed up right next to each other with no space or egg showing in between!
- Continue wrapping the embroidery floss around the egg until it is completely covered.
- Allow to dry.
- Make your egg beautiful with the embellishments of your choice!

Please like & share:
Leave a Reply
*