Great Gift – Child’s Name for Baby Shower or Birthday!
April 18, 2017|Posted in: Uncategorized
Name Gift – For Baby Shower or Birthday!
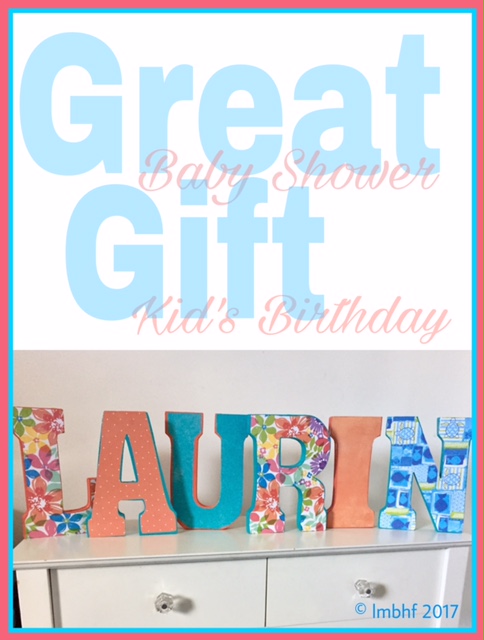
Great Gift – Kid’s Name for Baby Shower or Birthday
I made this gift for my niece’s baby shower last week. Her little girl is due in June and we can’t wait to meet her! Baby’s name is perfect for a tabletop or wall decoration in her nursery. She has a “Finding Dory” theme in the colors of coral and torqousie. It’s pretty easy to make and fairly quidk too and it’s Oh So Cute! So next time you need a gift for a baby shower or a child’s birthday you’re all set!
Name Gift Instructions
Here’s What You’ll Need
- Wooden Letters to Spell Out the Child’s Name. You can but these at your local craft supply store.
- 6 Pieces of Pretty Scrapbook Paper in Coordinating Colors & Patterns. Do not use cardstock or coated or glittered paper. Paper must be able to soak up the glue! (You might want to find out how the their bedroom is decorated, if you don’t already know. That way you can make sure the colors you choose will match).

Wooden Letters and Pretty Scrap Book Paper
- Two Colors of Acrylic Paint.
- Paint Brush.
- Pencil
- Scissors
- Decopauge Glue.
- Clear Coat Spray
Here’s What You’ll Need to Do:
1. Trace one letter, upside down, on the back of each piece of scrapbook paper.
2. Cut the letters out, just inside of the tracing line.
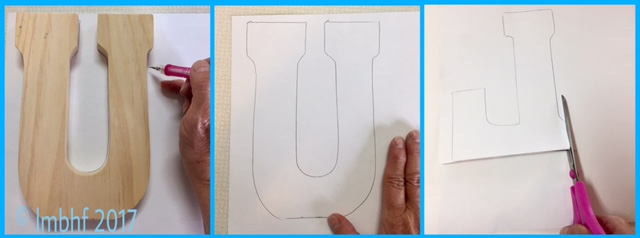
Trace and cut out the letters.
3. Paint the back of each of the letters in alternating colors and allow to dry.
4. Paint the front of each of the letters in alternating colors and allow to dry.
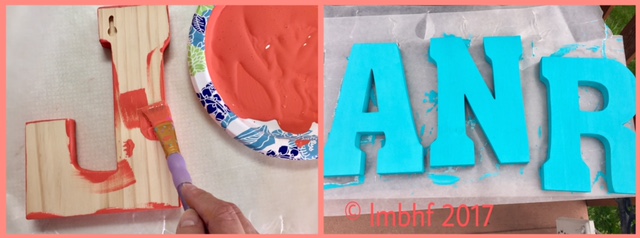
Paint the letters alternating colors.
5. Coat the front of each letter with decopauge glue and carefully apply the scrapbook paper to the glue, taking care to smooth out any air bubbles.
6. Firmly rub the entire surface of the letter to make sure the scrapbook paper is securely attached.
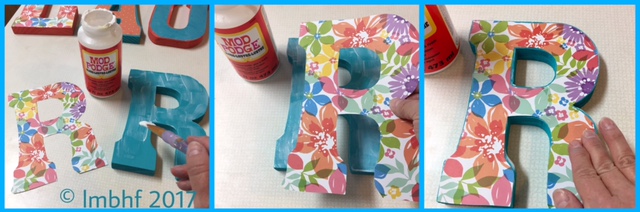
Apply Scrapbookk Paper to Letters.
7. Apply a coat of decopauge glue over the top of the scrapbook paper and allow to dry slightly.
8. If any bubbles appear under the scrapbook paper, carefully smooth them out using a smooth plastic surface (I used the bottom of the glue bottle).
9. If a few bubbles still remain, that is alright. They shoud smooth out as the glue dries completely.
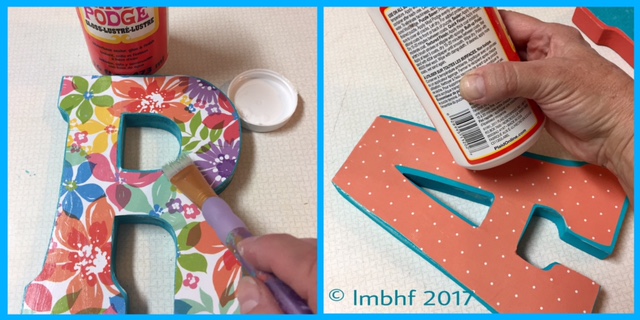
Smooth out any bubbles trapped under the paper.
10. Spray your completed project with a clear coat protectant spray. Allow to dry completely (12 to 24 hours).
Wrap up your gift and you’re ready to go to the party! The guest of honor is sure to love their special personalized gift!
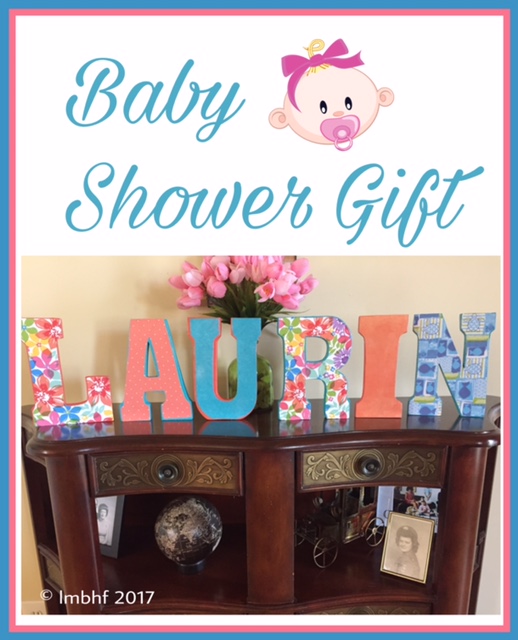
Personalized Name Gift – Finished Product.
You might also enjoy reading: Silhouette CAMEO® – My Top Five Favorite Projects
Here are some related products you might like. Click on the photo or the description to be directed to Amazon where you can purchase the items.

ColorBok 73480A Designer Paper Pad Wild & Free, 12″ x 12″
Mod Podge Waterbase Sealer, Glue and Finish (8-Ounce), CS11201 Gloss Finish

Apple Barrel Acrylic Paint Set

WINOMO Art Paint Brush Set for Watercolor Acrylics Oil Face Painting – 15 Pieces

Duncan Ceramic Spray Sealers clear gloss 12 oz.

12 Comments
Leave a Reply
*
Donna
April 18, 2017
What a beautiful gift! Thanks for sharing!
Amy
April 18, 2017
Love the way the name turned out ! Really cute and seems like it comes together easily.
LoriGraceH
April 24, 2017
It does, thanks Amy!
Roseann Hampton
April 19, 2017
This is such a great idea! Thanks for the tutorial! Pinning!
LoriGraceH
April 24, 2017
You’re welcome Roseann!
Stephenie - Blended Life Happy Wife
April 20, 2017
This is an awesome idea. I love it not only for a gift buy for my children and grandchildren’s rooms. I even think they could participate in the project. I love handmade gifts they come with so much love. Thank you for sharing this fun project in the All For Mamas Link Party Week 5 #allformamas. I will share this post on the Facebook group page, on my page , Pinterest, Twitter, Stumbelupon and G+
LoriGraceH
April 24, 2017
Thank you Stephenie! Kids would have a great time helping with this project!
Grammy Dee
April 20, 2017
Very nice, I like it! Thank you Lori for attending the #WednesdayAIMLinkParty. I shared your post on Facebook, Google+, Pinterest, and Twitter.
Rhonda
April 25, 2017
The gift is so cute, and the timing perfect. I will be attending a baby shower in a few weeks, so I need to come up with a gift. Thanks for sharing on Sunday’s Best.
LydiaF
April 25, 2017
Love this project! I’ll bet it was a lot of fun to make 🙂 Thanks for sharing with us at Creatively Crafty #ccbg 🙂
Susan
April 25, 2017
Great gift for any occasion. Thank you for posting.
LoriGraceH
April 26, 2017
Thank you Susan!